 Nam
Nam

The last three websites I put on the internet each took under ten minutes to deploy and cost me exactly £0 a month. No server, no nginx, no TLS certificate to renew, no invoice. I push to main; about a minute later the change is live on a global CDN.
If you learned to deploy websites more than a few years ago, that sentence should sound suspicious. It isn’t — it’s just that the boring parts got absorbed into free tooling while nobody threw a parade. In NamLoop, Part II I wrote about why this feels so different. This post is the other half: the exact recipe, click by click, so you can do it today.
I’ll use my little side project NamLoop (an ad-free YouTube looper) as the worked example, but the same five steps deploy any site — a static portfolio, an Astro blog, a Next.js app.
Table of contents
Open Table of contents
What you’re building — and what it costs
The end state: your GitHub repo is connected to Cloudflare, and every push automatically builds and deploys your site to Cloudflare’s edge network, served over HTTPS from a *.workers.dev URL (a custom domain is one extra click). That’s continuous deployment — CI/CD — and on the free tier it genuinely costs nothing.
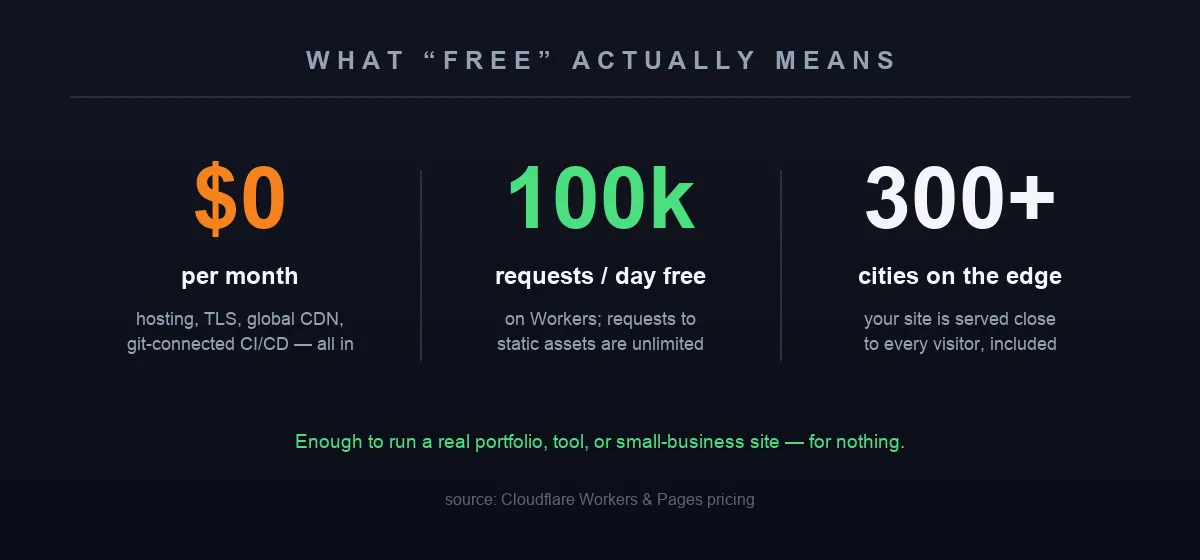
The honest numbers. A static site is effectively free forever; a Worker app gets 100,000 requests/day before you’d even think about paying. Source: Cloudflare Workers & Pages pricing.
Cloudflare’s Workers free plan allows 100,000 requests/day, and requests to static assets are unlimited on every plan. For a portfolio, a brochure site, or a tool like NamLoop, you will almost certainly never hit a paid tier. I’ll list the real limits honestly at the end.
Step 1 — Star it, then fork or clone
Head to the repo you want to deploy — for this walkthrough, github.com/NamNamChanChan/NamLoop.
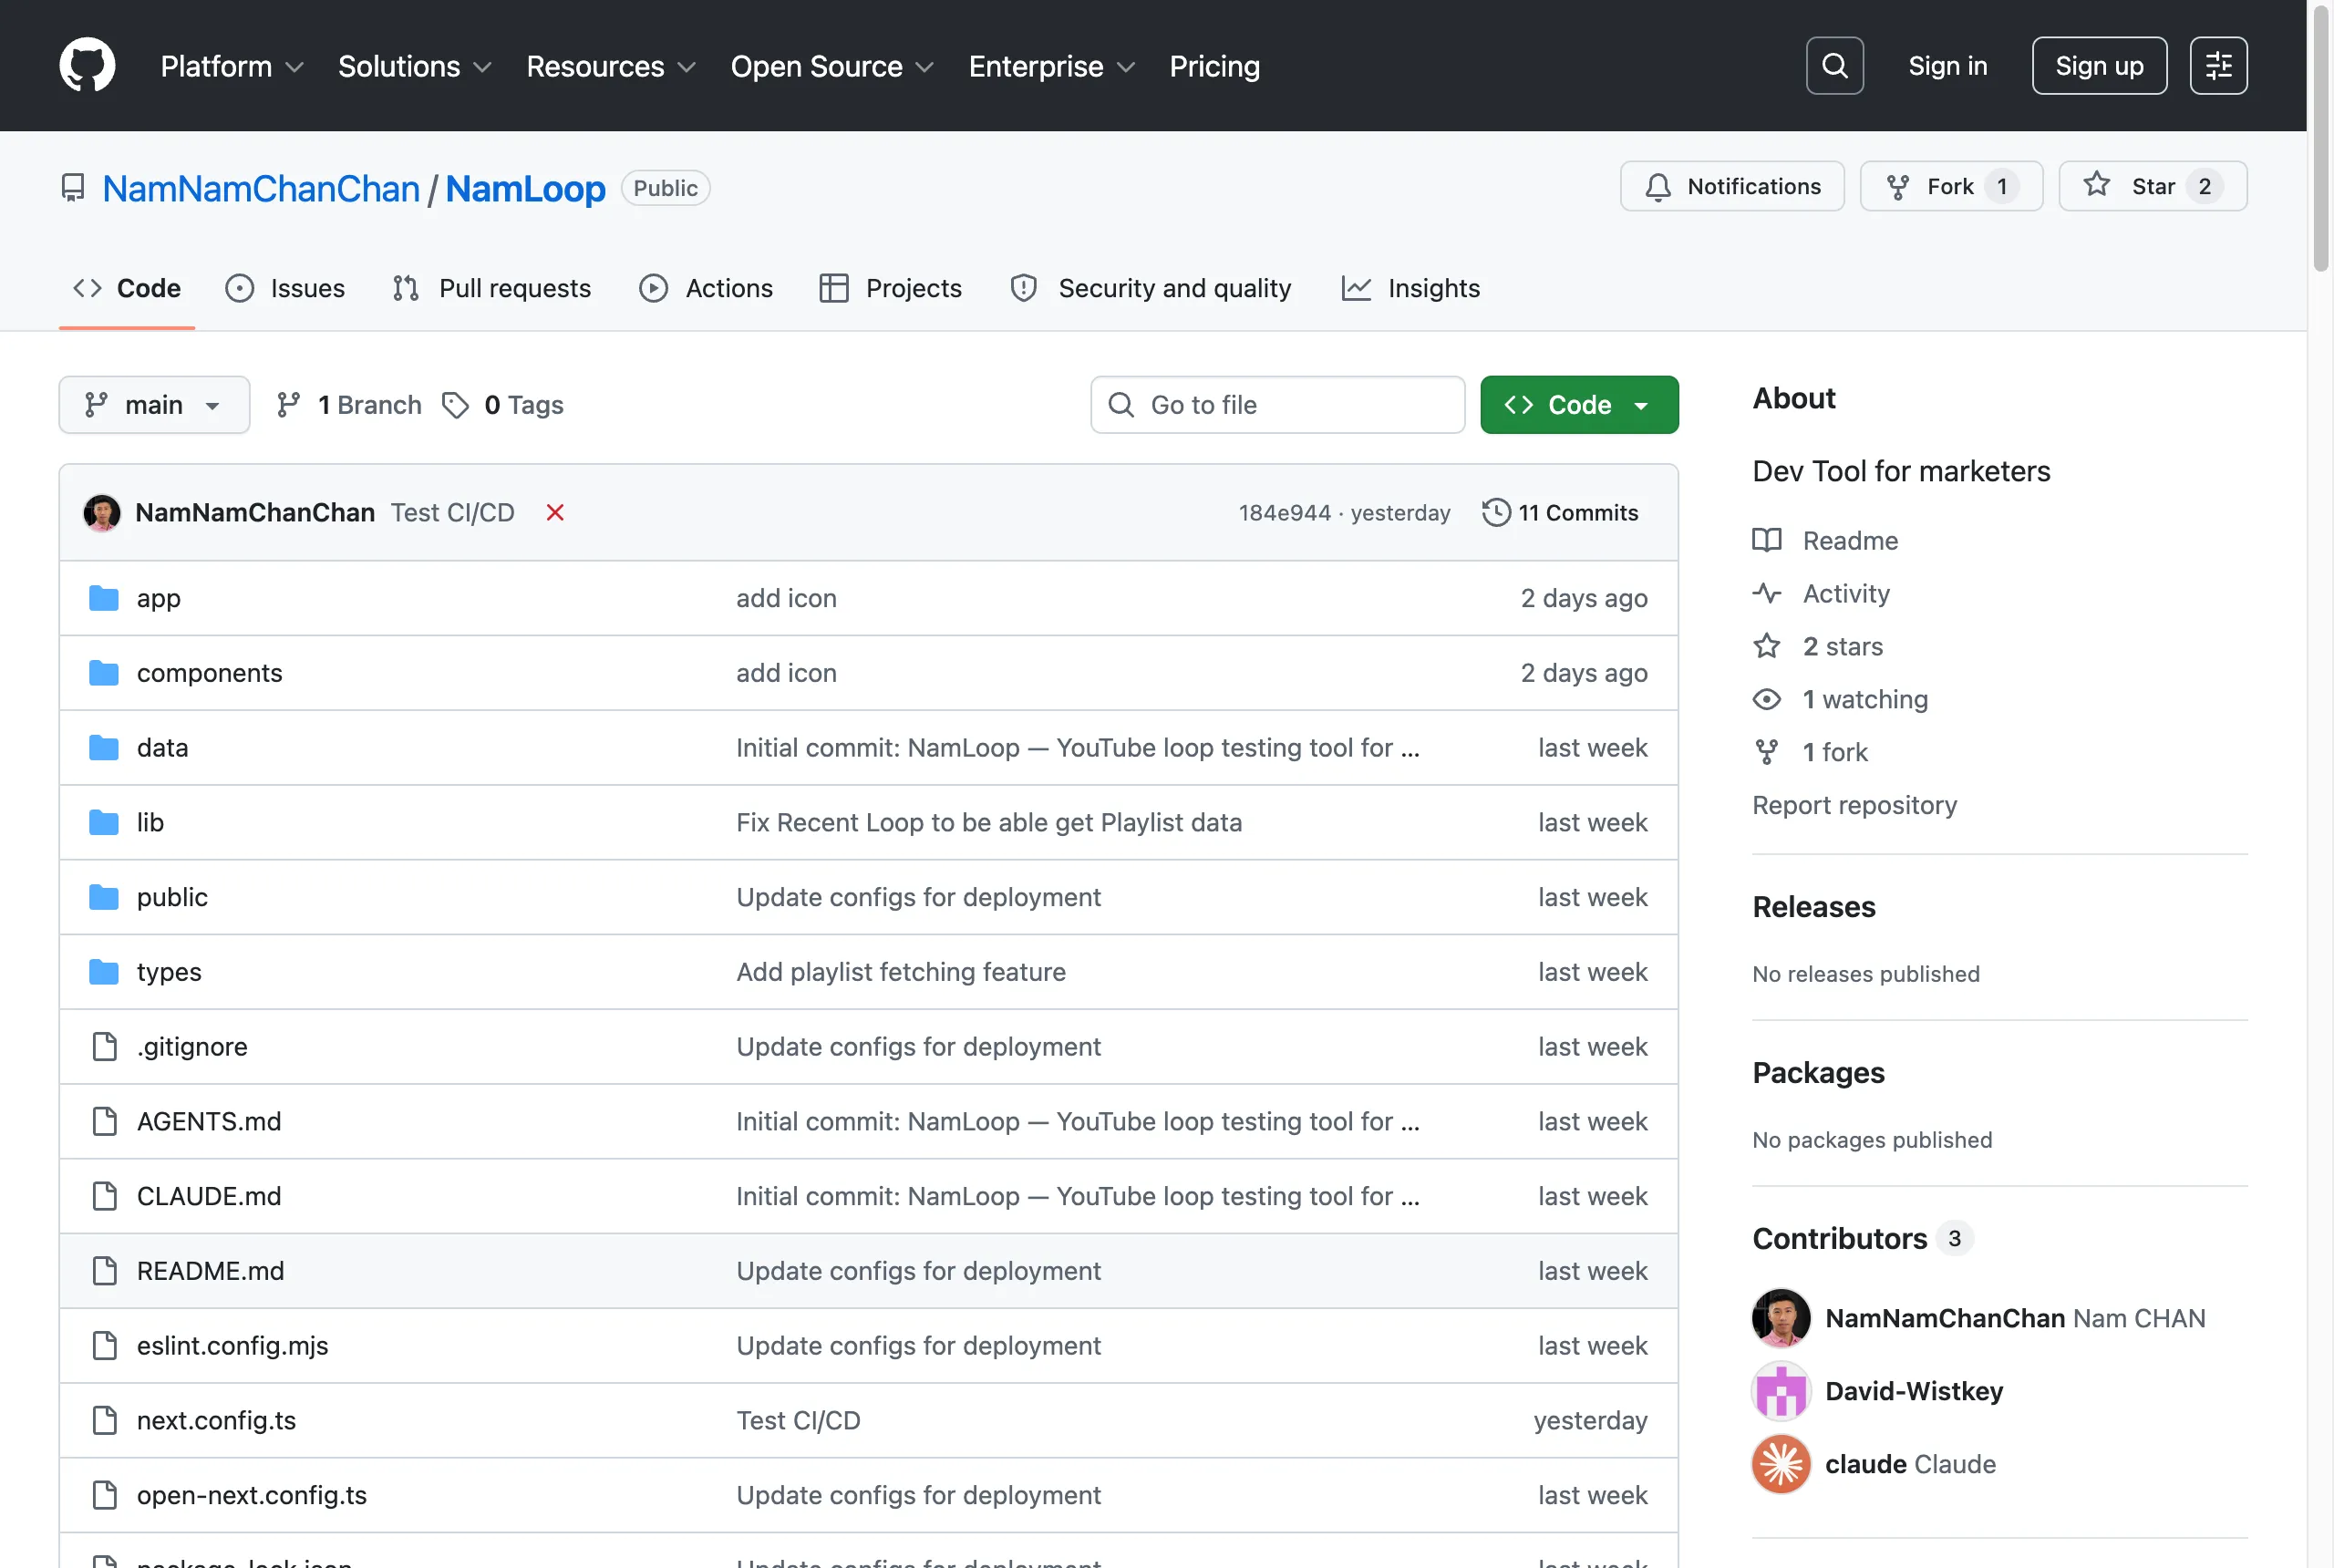
Any public repo you can see, you can fork. The Star and Fork buttons live together at the top-right.
Three buttons matter here, and they do different jobs:
- Star ⭐ — a bookmark plus a quiet thank-you to the author. It doesn’t copy anything; it just makes the repo easy to find again (and, honestly, it makes an open-source author’s day).
- Fork — makes your own copy of the repo under your GitHub account. This is the one you want if you’re deploying someone else’s project, because Cloudflare will deploy from a repo you control.
- Clone — downloads a copy to your laptop so you can run it locally:
git clone https://github.com/NamNamChanChan/NamLoop.git
cd NamLoop
npm install
npm run dev        # open http://localhost:3000 to see it running locally
For deploying your own project, skip the fork and just push your code to a GitHub repo of your own. Either way, the rule is simple: Cloudflare deploys from a GitHub repo you own.
Step 2 — Get a free Cloudflare account
Go to dash.cloudflare.com/sign-up, enter an email and a password, verify the email. That’s it — no credit card for the free tier. Two minutes, and you never have to touch DNS or servers to follow this recipe.
Step 3 — Open “Workers & Pages”
In the Cloudflare dashboard sidebar, click Workers & Pages. This one section is the home for both of Cloudflare’s site-hosting products, and a quick word on which to use in 2026:
- Workers is the one to reach for now. It hosts everything from a folder of static files to a full server-rendered app, and it’s where Cloudflare is putting all its new work. All three of my sites (this blog, krystle.hk, NamLoop) run on Workers.
- Pages is the older sibling, built for purely static sites. It still works well, and if you only have a folder of HTML it’s a perfectly fine choice — but for anything new I’d start on Workers.
For a beginner deploying a static site, either works. Pick Workers and move on — the git-connected flow below is nearly identical for both, and Workers is the path Cloudflare is investing in.
Click Create, then find Import a repository.
Step 4 — Connect GitHub
Cloudflare will ask to connect your Git account. Choose GitHub, authorise it (you can grant access to all your repos or just selected ones — selecting only the repo you’re deploying is the tidy option), then pick your repo from the list — your NamLoop fork, or your own project’s repo.
This is the handshake that makes the magic recurring: from now on, Cloudflare watches that repo and redeploys whenever you push.
Step 5 — The build & deploy command
This is the only technical step, and it’s two fields. When Cloudflare builds your site it runs a build command (which turns your source into a folder of files or a Worker) and then a deploy command (which ships it). Here’s exactly what to put:
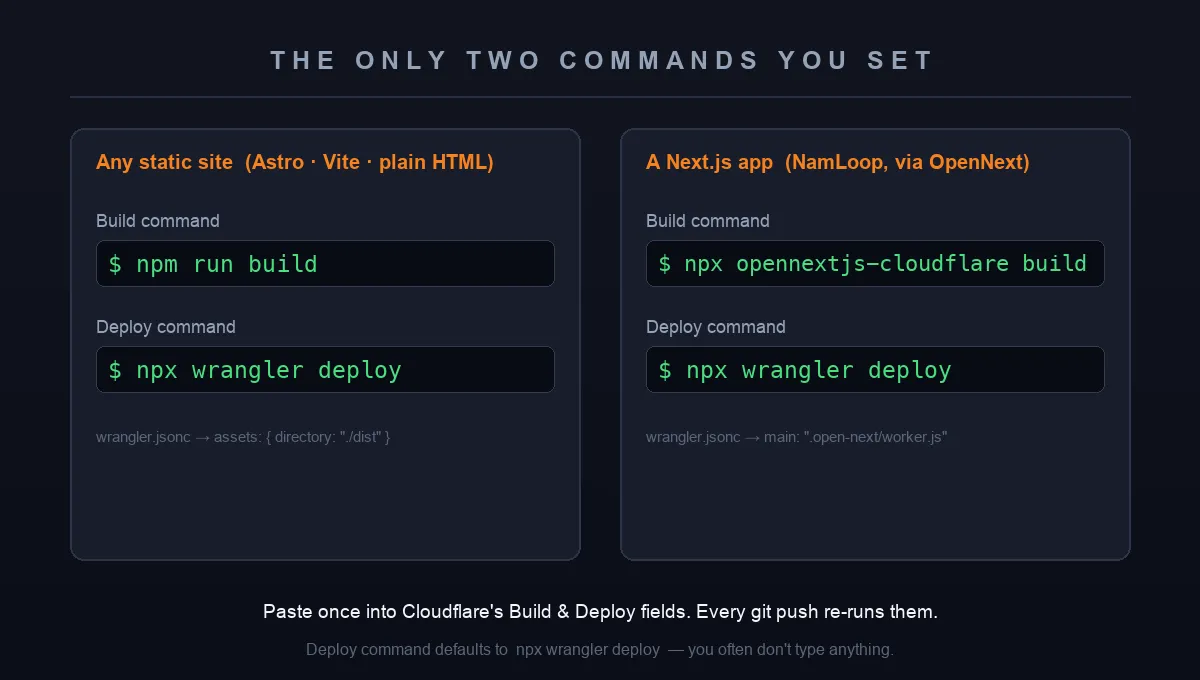
Two recipes cover almost everything. The deploy command defaults to npx wrangler deploy, so most of the time you only set the build command.
For a static site (an Astro blog, a Vite app, plain HTML — like this blog):
- Build command:
npm run build - Deploy command:
npx wrangler deploy(this is the default — you often leave it untouched)
A static site needs a two-line config file in the repo, wrangler.jsonc, telling Cloudflare “this is just a folder of files”:
{
  "name": "my-site",
  "compatibility_date": "2026-07-04",
  "assets": {
    "directory": "./dist",
    "not_found_handling": "404-page"
  }
}
For a Next.js app (like NamLoop, which uses the OpenNext adapter to run on Cloudflare):
- Build command:
npx opennextjs-cloudflare build - Deploy command:
npx wrangler deploy
NamLoop’s wrangler.jsonc already ships in the repo (it points main at the built .open-next/worker.js), so if you forked it, there’s nothing to write — Cloudflare will find it.
Connect a repo with no wrangler.jsonc and Cloudflare’s autoconfig detects your framework (Astro, Next.js, etc.) and opens a pull request adding the right config, plus a preview deployment to test before you merge. You can genuinely start from “just my code” and let the platform propose the wiring.
Click Save and Deploy. Cloudflare clones the repo, runs your build, deploys it, and hands you a live https://<project>.workers.dev URL — served worldwide, HTTPS included, in about a minute.
You don’t strictly need the dashboard. With the repo cloned, this ships it straight from your machine:
npx wrangler login    # one-time browser auth with Cloudflare
npm run deploy        # NamLoop's script: builds with OpenNext, then deploys
The git-connected setup above is just this, automated on every push so you never have to remember to run it.
From now on, git push is deploy
That’s the whole point. Once step 5 is done, deployment stops being a task:
git add -A
git commit -m "tweak the hero copy"
git push origin main   # ~1 minute later, it's live worldwide
Cloudflare rebuilds and redeploys automatically. Want a real address instead of *.workers.dev? In the project’s settings, add a custom domain — if your domain is on Cloudflare, the DNS record and TLS certificate are created for you in one click. I did this for loop.nam-ai.uk in about thirty seconds.
The honest catches
Because I won’t sell you a free lunch without reading the menu:
- The free tier is generous, not infinite. Workers free = 100,000 requests/day; static-asset requests are unlimited. Fine for a portfolio or a tool; a viral launch day is when you’d look at the $5/month plan.
- The edge runtime isn’t quite Node. A Worker isn’t a normal server. Most things work, but the exceptions (e.g. NamLoop disables Next’s image optimizer, which the Worker runtime doesn’t run) announce themselves at build time.
- “Trivial” assumes no backend. The moment you need a database, logins, or queues, you’re back to real architecture — Cloudflare will sell you its versions (D1, KV, R2), and that’s a fine road, but it’s a road, not a checkbox.
- A little lock-in is the price of the magic. A
wrangler.jsonchere, a build setting there. For a static folder it’s minutes to move elsewhere; lean on platform storage and it’s more.
I go deeper on all of this in NamLoop, Part II — this post is the recipe; that one is the reflection.
Takeaway
Somewhere in the last few years, deploying a website quietly turned into a save button. The recipe above is the same whether you’re shipping a weekend toy or a client’s site: star, fork, connect, one build command, push. The hard part was never getting it online — it’s deciding the thing is worth putting online at all.
So pick a repo — mine, a template, or something you built this week — and give it an address. It’ll cost you ten minutes and nothing else.
Stuck on a step, or want a second pair of eyes before you point a real domain at it? Email me — I’m happy to help you get it live.
If this helped, there’s more where it came from: follow me on Medium, subscribe or bookmark nam-ai.uk for new build-in-public posts, and come connect on LinkedIn — I like meeting people who ship things.